Daily operations
There are 2 useful websites when learning Gitflow or Git in general.
- learngitbranching - Good to learn the basic git version control with all the lovely graph.
- gitflow-animated - It's a tool to visualize and animate the Gitflow.
Gitflow Workflow
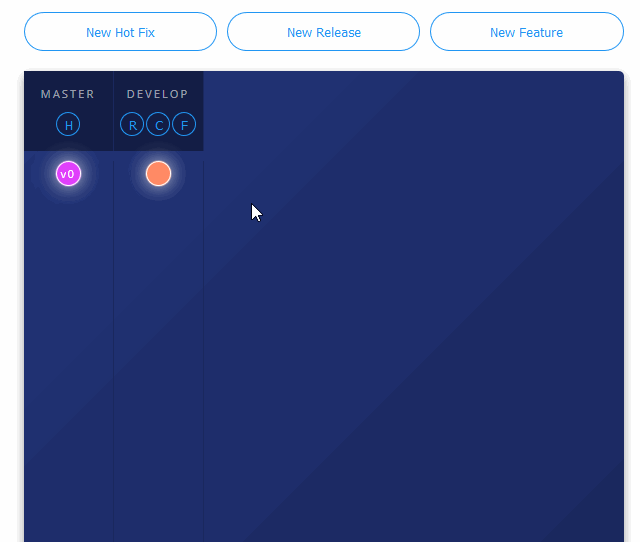
Source: gitflowanimated
Gitflow is a branching model and workflow strategy for version control with Git. It defines a structured approach for managing Git branches to help teams coordinate software development tasks effectively. It categorizes branches into feature, release, hotfix, and other types, ensuring a well-organized development process. This model encourages collaboration, simplifies release management, and maintains a clean and stable codebase. You may find more information on Bitbucket - Gitflow Workflow.
In Git Flow, managing a feature branch while the develop branch gets frequently updated can indeed lead to merge conflicts. To avoid this, frequently rebase the feature branch against the develop branch. This keeps your branch updated with the latest changes and reduces the risk of large, unmanageable conflicts later.
git checkout feature/your-feature-branch
git fetch origin
git rebase origin/develop
Local operations
Discard unstaged changes
https://stackoverflow.com/questions/52704/how-do-i-discard-unstaged-changes-in-git
For all unstaged files in current working directory use:
git restore .
For a specific file use:
git restore path/to/file/to/revert
Remove all local branches but keep master
git branch | grep -v "master" | xargs git branch -D
Origin
Add new origin in theory
$ git remote add origin https://github.com/schacon/simplegit-progit
Running the command above adds a section to your repository’s .git/config file, specifying the name of the remote (origin), the URL of the remote repository, and the refspec to be used for fetching:
# Origin is remote name, URL is the remote address
# Fetch means where the data comes from and where it goes
[remote "origin"]
	url = https://github.com/schacon/simplegit-progit
	fetch = +refs/heads/*:refs/remotes/origin/*

The format of the refspec is, first, an optional +, followed by <src>:<dst>,
where <src> is the pattern for references(指住某一commit既別名) on the **remote side**
and <dst> is where those references will be tracked **locally**.
The + tells Git to update the reference even if it isn’t a fast-forward.

master其实是一个“refspec”,正常的“refspec”的形式为”+<src>:<dst>”,
冒号前表示local branch的名字,冒号后表示remote repository下 branch的名字。
注意,如果你省略了<dst>,git就认为你想push到remote repository下
和local branch相同名字的branch.
Pulling a branch from another repository
https://stackoverflow.com/questions/14383212/git-pulling-a-branch-from-another-repository
git remote add fork <url_of_fork>
git fetch fork
git checkout -b fork_branch fork/<branch>
Rename a local and remote branch
How do I rename both a Git local and remote branch name?
- Rename your local branch.
#If you are on the branch you want to rename:
git branch -m <new_name>

#If you are on a different branch:
git branch -m <old_name> <new_name>
- Delete the old-branch-name remote branch and push the new-name local branch.
git push origin :<old_name> <new_name>

# OR use the newer syntax (available since Git v1.7.0):
git push origin --delete <old_name>
- Reset the upstream branch for the new-name local branch.
git push origin -u <new_name>
So when you do something like git push origin :old-name, you are finding old-name branch from origin and specifying an empty source to update it.
references: Git Internals - The Refspec
# These 2 lines are equal
git push origin master
git push origin master:master

# Use local master branch to update a remote branch called mybranch
git push origin master:refs/for/mybranch
Fork after cloning
Reference: First rename the old remote as upstream, in case you want to be able to keep in sync with the original repository.
git remote rename origin upstream
Then add your forked repository as origin:
git remote add origin https://github.com/<your-username>/<your-project>
To push to your repository:
git push -u origin master
To pull from the base repository:
git pull upstream
Other
Create support branch for hotfix(Gitflow)
Reference: Following git-flow how should you handle a hotfix of an earlier release?
It seems that there is a concept of a "support" branch in git flow. This is used to add a hotfix to an earlier release.
This thread has more information, with these examples:
git checkout 6.0
git checkout -b support/6.x
git checkout -b hotfix/6.0.1
... make your fix, then:
git checkout support/6.x
git merge hotfix/6.0.1
git branch -d hotfix/6.0.1
git tag 6.0.1
or using git flow commands
git flow support start 6.x 6.0
git flow hotfix start 6.0.1 support/6.x
... make changes then:
git flow hotfix finish 6.0.1
In one go
Fast forward merge with pulling
Reference: Merge, update, and pull Git branches without using checkouts
git checkout master
git pull
git checkout foo
git merge origin/master

# ---------------- can be done in one line ----------------
# If you want the fetch command to fail if the update is non-fast-forward, then you simply use a refspec of the form
git fetch <remote> <sourceBranch>:<destinationBranch>

# If you want to allow non-fast-forward updates, then you add a + to the front of the refspec:
git fetch <remote> +<remoteBranch>:<localBranch>


# ============== Examples ==================
# Merge local branch foo into local branch master,
# without having to checkout master first.
# Here `.` means to use the local repository as the "remote":
git fetch . foo:master

# Merge remote branch origin/foo into local branch foo,
# without having to checkout foo first:
git fetch origin foo:foo
<refspec> in the git fetch [<options>] [<repository> [<refspec>…]]
The format of a <refspec> parameter is an optional plus +, followed by the source ref <src>, followed by a colon :, followed by the destination ref <dst>.
The remote ref that matches <src> is fetched, and
- if
<dst>is not empty string, the local ref that matches it is fast-forwarded using<src>. - If the optional plus
+is used, the local ref is updated even if it does not result in a fast-forward update.
Trouble shooting
Git revert multiple git commits
How to revert multiple git commits?
For doing so you just have to use the revert command, specifying the range of commits you want to get reverted.
Taking into account your example, you'd have to do this (assuming you're on branch 'master'):
git revert master~3..master

#  a slightly more idiomatic way
# The --no-commit option lets git try to revert all the commits at once, instead of littering the history with multiple revert commit messages
git revert --no-commit HEAD~2..
or git revert B...D or git revert D C B
This will create a new commit in your local with the inverse commit of B, C and D (meaning that it will undo changes introduced by these commits):
A <- B <- C <- D <- BCD' <- HEAD
Commit case-sensitive only filename changes
As long as you're just renaming a file, and not a folder, you can just use git mv:`
git mv -f yOuRfIlEnAmE yourfilename
(As of a change in Git 2.0.1, the -f flag in the incantation above is superfluous, but it was needed in older Git versions.)
Git Version Control Best Practices
Beyond Gitflow and local operations, adopting robust version control practices can make your development process smoother. Below are three essential concepts: Semantic Versioning, conventional-changelog, and commit linting.
Semantic Versioning
Semantic Versioning (SemVer) is a standardized system to number your releases using the format:
MAJOR.MINOR.PATCH
- MAJOR: Increment when you make incompatible API changes.
- MINOR: Increment when you add functionality in a backward-compatible manner.
- PATCH: Increment when you make backward-compatible bug fixes.
Why Use Semantic Versioning?
- Clarity: Quickly communicate the scope of changes.
- Predictability: Manage dependencies and integrations more smoothly.
- Industry Standard: Widely adopted in many open source and internal projects.
Example:
If your library is at 1.0.0 and you add a new feature, update to 1.1.0. Then, a bug fix would lead to 1.1.1.
conventional-changelog
conventional-changelog automates the generation of a changelog from your commit messages. It relies on a consistent commit message format—often the Conventional Commits format.
How It Works:
- Structured Commit Messages:
Write commits using a standard format, for example:feat: add user authentication module
fix: resolve session timeout issue
docs: update README with setup instructions - Automated Parsing:
The tool parses these messages and aggregates them into a changelog. - Changelog Generation:
A human-readableCHANGELOG.mdis produced that documents changes between versions.
Getting Started:
Install globally via npm:
npm install -g conventional-changelog-cli
Then generate the changelog:
conventional-changelog -p angular -i CHANGELOG.md -s
(The -p angular flag uses the Angular commit convention, a popular implementation of Conventional Commits.)
Commit Linting
Commit linting ensures that all commit messages adhere to a predefined format, typically the Conventional Commits standard. Tools like commitlint enforce these rules.
How It Works:
- Git Hooks:
Integrate with tools like Husky to run validations during the commit process. - Validation:
The commit message is checked against rules. If it doesn’t comply, the commit is rejected. - Feedback:
Developers receive immediate feedback to correct the message format.
Setting Up Commit Linting:
-
Install Dependencies:
npm install --save-dev @commitlint/{config-conventional,cli} husky -
Configure Commitlint:
Create a
commitlint.config.jsfile:module.exports = { extends: ['@commitlint/config-conventional'] }; -
Set Up Husky Git Hook:
In your
package.json, add:"husky": {
"hooks": {
"commit-msg": "commitlint -E HUSKY_GIT_PARAMS"
}
}
With these tools and practices, your Git workflow will be more consistent, automated, and easier to maintain over time.